|
|

|
|
|
|
| |
|

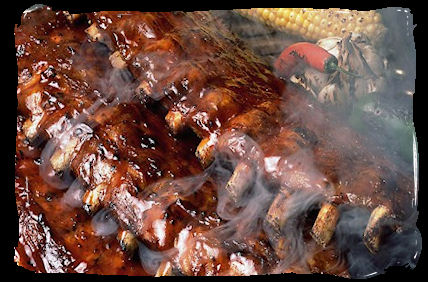
The cooler weather is here and the weather is spectacular for outdoor cooking! Now, is the time to maximize your grill and savor the flavor. |

Your Barbecue Super Store |
| |
 |
So, you may be thinking about becoming a barbecue judge ... or perhaps you just want to know what it is that the judges are looking for (and tasting) when judging great barbecue. Who are the table captains? And what do they do? Who officiates the contests? Overcooked? Under cooked? Too Salty? Too flat tasting? Mushy? Tough? and many more.
Check out the 2013 Judging Classes and find one near you! |
| |
|
Featured BBQ'n
Video |
|
 |
|
|
|
|
 |
Beer
Can
Chicken
Sitter |
As you can see, there are various types of beer can chicken holders on the market today, each one being a little different, but all serving the same purpose - that being to hold your chicken vertical over direct heat while allowing flavorful ingredients in liquid to boil and infuse the chi chen from the inside out. Get yourself a chicken sitter to your liking and follow the rest of the instructions. It should be quite easy and a lot of fun. Follow along and get your beer can chicken on the grill smokin' away!
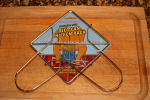
Fold up arms make this sitter |

Porcelain holder contains the ingredients
|

Simply insert a can into the center
|

Center portion contains the ingredients
|

Porcelain holder contains the ingredients |
The Beer Can Chicken Sitter is a great inexpensive device for infusing rich flavors into the cavity of the chicken during the cooking process, holding the chicken off the surface of the grill for more even cooking and making a really great conversation piece when friends and neighbors come by to eat. The primary purpose Beer Can Chicken Sitter is to heat the ingredients inside the can to the point of boiling thus cooking and filling the chicken with delicious flavors. The Beer Can Chicken Rack was designed to be used on the grill but can also be used in an oven.
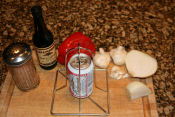 |
In this How To series, we are going to be using the first chicken sitter shown. Assembling the Beer Can Chicken Rack is extremely easy. Simply lift the arms of the Beer Can Chicken Rack over a 12 oz can of beer or soft drink, and lock the arms into place. There you have it … really simple. (For the record: A 16 oz can will not fit in the rack shown.)
So, now for the fun part. In our demonstration, we took a can of beer (could have used a soft drink also) and emptied ½ of the beer from the can. By doing so, it left us with room inside of the can for our goodies. Into the can we added chopped onion, crushed garlic, some basil and black pepper. We then simply lifted the arms around our can of beer ingredients and snapped them into place. Once assembled and ready to go, we allowed it to sit a few minutes while we worked on our bird. |
| Click Image To Enlarge |
| |
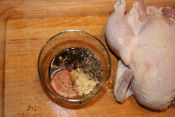 |
For our chicken, we first washed and lovingly patted it dry. We then trimmed any excess fat/skin from around the neck of the chicken. Photo:7281 Next, we combined our seasonings of a quality olive oil, fresh minced garlic, fresh ground black pepper, Worcestershire sauce, basil, poultry seasoning and a couple of other really cool ingredients. |
| Click Image To Enlarge |
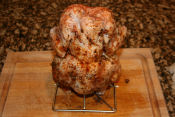 |
Next, we carefully slipped our fingers between the skin and the meat of the chicken so we could insert some of our seasonings under the skin so sink into the meat. Photo:7283 & Photo:7286 We then coated the rest of our chicken with the seasonings allowing it to sit there for a short while as the fire in our pit rose to our desired roasting temperature of 350° to 375°.
Having prepared Beer Can Chicken many times before, we knew we needed to have the beer can directly over the fire so the heat would cause the beer to begin boiling inside the can, thus releasing its flavor and moisture into the cavity of our chicken. We also knew that our chicken, as it cooked, would render grease from the skin thus causing flare-ups because the grease would drip directly onto the hot coals/fire thus burning the chicken on the outside while the inside was just getting started on the cooking process. We found this to be the one shortcoming of most chicken sitters, however is easily remedied |
| Click Image To Enlarge |
| |
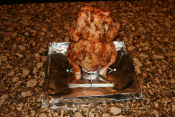 |
We pulled out some heavy-duty aluminum foil, doubled it over and creased the edges to make a disposable tray to catch the juices and grease. It also served to help diffuse the heat around our chicken for more even cooking. |
| Click Image To Enlarge |
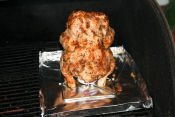 |
Now it was time to cook! We placed the aluminum foil “pan” directly over the fire. Photo:7298 Then, we carefully placed our chicken and rack directly in the middle of the foil, closed the lid and let the magic happen.
With the work done, we relaxed and enjoyed the process as the chicken began to take on warm cooked flavors and appearance. The aroma was delightful. |
| Click Image To Enlarge |
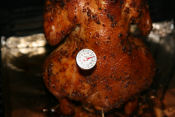 |
We cooked our chicken for a couple of hours, until the internal temperature reached 160° in the deepest part of the chicken between the thigh and the breast. We used an instant read meat thermometer to test the temperature. When we measured the temperature of the meat, we were sure the tip of the meat thermometer did not touch the bone, which would have given us a higher temperature than that of the meat. |
| Click Image To Enlarge |
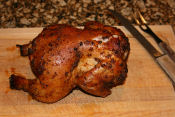 |
When we reached our 160°mark, we carefully removed our chicken, can and rack from the barbecue pit and allow it to cool for 10-15 minutes. Photo:7315 We then lifted our chicken from the Beer Can Chicken Rack and placed it on the cutting board. We allow the Beer Can Chicken Rack to cool before handling. |
| Click Image To Enlarge |
 |
Reviewed by Charlie McMurrey, Certified BBQ Judge and publisher of Barbecue’n On The Internet www.barbecuen.com |
|
|
| |
 Subscribe now to The Smoke 'N Fire Enquirer, the Internet's most popular backyard grilling and barbecuing on-line tutorial and we'll send you FREE recipes, techniques and tips for preparing the finest outdoor meals. FREE! See a Sample Newsletter Subscribe now to The Smoke 'N Fire Enquirer, the Internet's most popular backyard grilling and barbecuing on-line tutorial and we'll send you FREE recipes, techniques and tips for preparing the finest outdoor meals. FREE! See a Sample Newsletter
Names are really important because we give FREE STUFF away in our newsletters!
|

See Our Privacy
Policy Here


|
|
Since February, 1996
|
|
|
|

|
|